

October 6, 2025, 9:05 am | Read time: 2 minutes
Many children are fascinated by dinosaurs. But big kids and young-at-heart adults will also find true joy in this plaster excavation set. You can chip away material piece by piece and uncover treasures. The best part: It’s quick to make yourself and requires only a few materials.
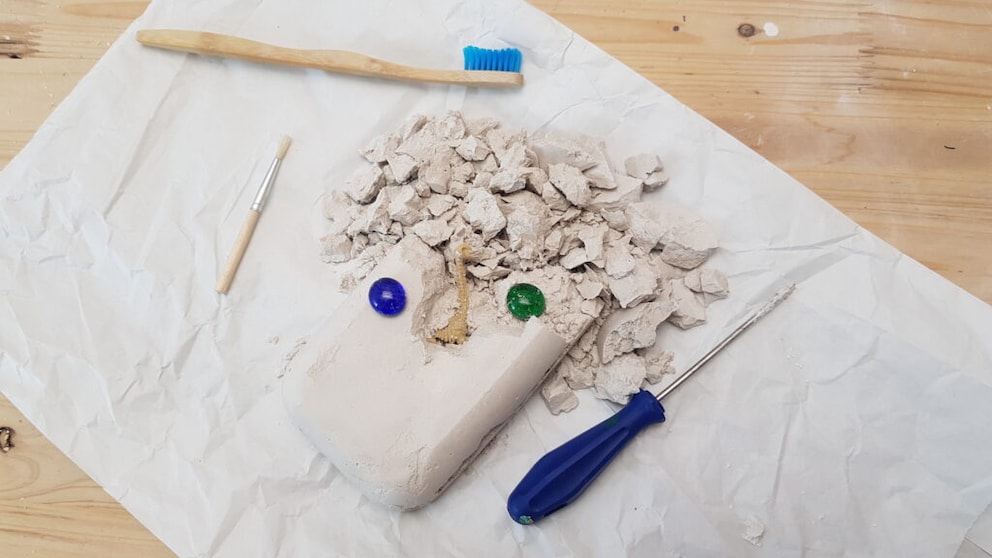
If you’ve always wanted to be an archaeologist, you can indulge in this DIY plaster excavation set. Hidden inside could be all sorts of rarities, sparkling gemstones, a dino skeleton, or perhaps an old coin. Tools such as a screwdriver, an old toothbrush, or a brush can be used for excavation. The set is surprisingly easy to make, requiring only some plaster and the appropriate finds.
What You Need for the Excavation Set
The material list for this small DIY project is very manageable. For one set, you need:
- Plaster
- Water
- Box (e.g., storage container)
- Spoon
- Finds
There are no limits when filling the excavation set. Dinosaur mini-figures are available in stores, but many other small items are also suitable. These include decorative glass stones, gemstones, plastic beads, or old coins.
Additionally, excavation tools are needed to retrieve the treasures from the plaster. Suitable tools include screwdrivers, hammers, toothbrushes, and brushes. When children are handling the tools, especially the hammer, an adult should always be present.
Tip: Perfect for a dino-themed children’s birthday party is a larger set that several young archaeologists can work on simultaneously. For this, use a larger mold, such as a baking sheet. Don’t worry, the plaster can be easily washed off with water.
Making an Excavation Set – Step by Step Explained
The set is very easy to make yourself. The best consistency is achieved when you mix the plaster with about half the amount of water. However, you should allow enough time for the plaster to harden properly. It usually dries within a few hours, but it’s best to let it sit overnight.
- Mix plaster with water (ratio 2:1)
- Pour a layer of plaster into the box
- Place stones and figures on the plaster
- Cover with plaster
- Let it dry
- Remove plaster from the mold
Tip: Excavation work creates a lot of dust and dirt. It is therefore advisable to use a sturdy underlay to prevent the table from getting scratched.