

January 26, 2022, 11:05 am | Read time: 3 minutes
Many DIY enthusiasts know the problem: You want to screw something into the wall or a piece of wood, but it ends up crooked. It’s frustrating, but it doesn’t have to happen. There are several methods to drill straight holes.
Even though there are special drill stands at hardware stores that can help align the drill, you can also use simpler methods. For one of the two tricks to drill straight holes, you only need something most people already have at home–an old CD-ROM. The other trick is a bit more involved but still saves you from needing a drill stand from the store.
1. Drill Straight Holes with an Old CD
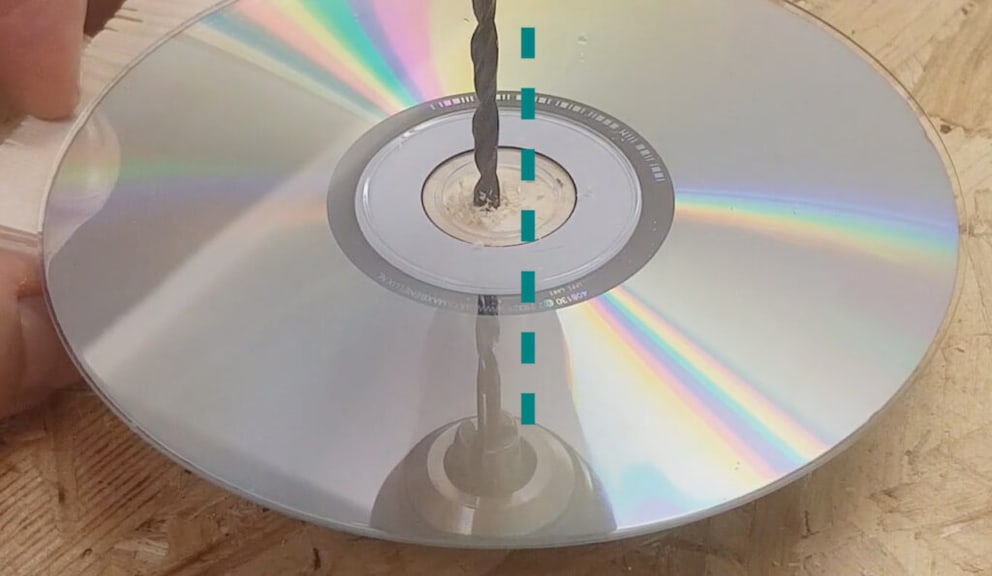
Even though the good old CD is rarely used today, it can still be quite useful for drilling. Its surface acts like a mirror, and you can drill through the hole in the center. When you look down at the spot where the hole should be, the reflections on the CD show whether the drill is positioned vertically. Even a slight tilt becomes immediately apparent, allowing you to easily correct the angle. This trick can also help when joining with wooden dowels–where precision is key–during drilling.
Also interesting: How to drill into tiles correctly
2. Drill Straight Holes with a DIY Drill Guide
If you don’t have an old CD handy but do have some square timbers, you can use another trick to drill straight holes. However, some preparation is necessary for the homemade drill guide. In addition to the square timbers, you’ll need a carpenter’s square or a protractor, two screws, a clamp, and a drill with a suitable wood bit. Here’s how to proceed:
- Cut the square timbers to about 4 inches if needed–ensure right angles
- Fix the wooden parts at right angles, using a small board as a support
- Check the right angle with a carpenter’s square or protractor
- Pre-drill the square timbers and screw them together flush
Once you’ve screwed the wooden parts together at right angles, you can use them as a homemade drill guide to drill straight holes. Simply position the drill at the inner edge so that it rests cleanly against it. Now you can drill–and reuse the drill guide as often as needed.
Also interesting: With a folding ruler, you can easily measure angles

Tip: To avoid drilling holes too deep into the material, you can mark the drill with a piece of tape at the appropriate spot. Here you can find a guide on how to drill correctly in 5 steps.