


November 26, 2022, 11:47 am | Read time: 6 minutes
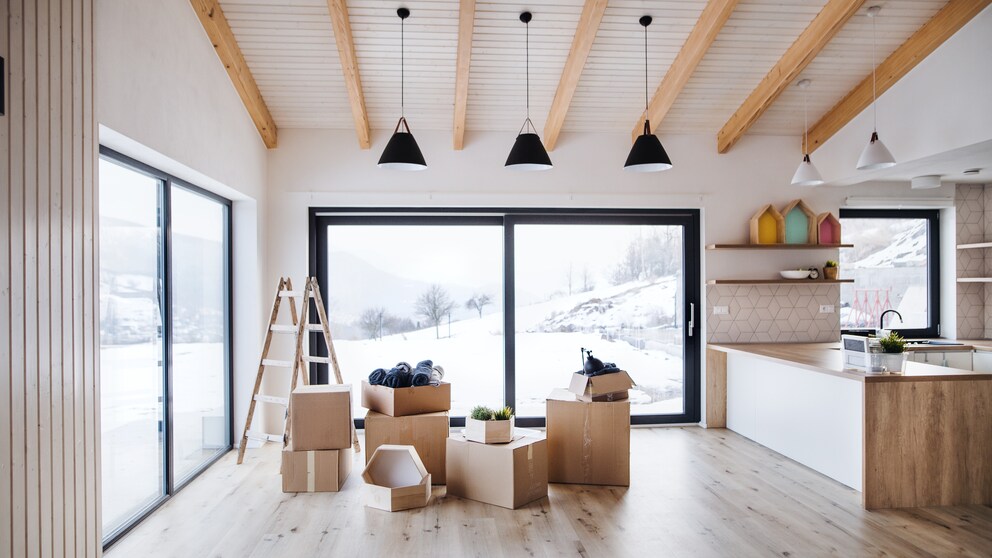
Wooden ceilings were long considered outdated. They seemed gloomy, old-fashioned, and visually oppressive. Today, wooden ceilings are back in style, but only under these conditions: The wooden ceiling is simple, designed in light colors, and opens up the space.
Whether oak, larch, pine, or spruce, there are many types of solid wood suitable for ceiling cladding. When choosing, one should consciously select a type of wood that emphasizes the desired look.
Overview
The Wooden Ceiling Makes a Comeback
Natural woods are as diverse as the design methods associated with them. Unfortunately, wooden ceilings were long disparaged and considered out of fashion. However, this has changed in times of sustainability and environmental awareness. In modern architecture, there has been an increased search for a vibrant building material that offers a warm contrast to the monotony of other materials like concrete. Today, wooden ceilings are back in vogue and enjoy great popularity.
Suitable Types of Wood for the Ceiling
Light and Bright Woods for Interior Ceiling Design
Depending on the desired look, various types of wood are suitable for the wooden ceiling. If you want to achieve a light and open look with the ceiling design, real wood types like pine, spruce, ash, or larch would be suitable. It is also important that the furniture matches the desired type of wood. For a light and non-rustic look, make sure that there are not too many knots visible in the wood. With the recommended types of wood above, you are definitely on the right track.
Rustic Woods for Interior Ceiling Design
If you want to achieve a rustic yet modern flair indoors, wood types like spruce and oak, brushed larch or brushed oak, reclaimed wood, pine, and hacked ash are suitable. To enhance the rustic appearance, it is always good to choose a brushed or hacked type of wood. This special rustic texture of the wood enhances the visual impact but is still not intrusive and provides a warm living atmosphere.
Preparing the Ceiling Cladding with Wood
For ceiling cladding with wood, you should pre-mount squared timbers for the substructure. Also, remember that with a substructure and the installation of the wooden ceiling, you may lose room height. Before installing the wooden ceiling, you should also consider the lighting design. Wires and cables can be well hidden under the ceiling, and holes for direct or indirect lighting can be pre-drilled if necessary.
Also interesting: What are the options for cladding concrete stairs?
What to Consider Before Installing the Wooden Ceiling
As mentioned before–a substructure for the wooden ceiling is essential. It greatly facilitates the installation of the ceiling cladding. Additionally, cables and insulation material can be hidden and mounted behind it. Which substructure is ultimately suitable for the ceiling design depends on several factors. Room height plays an important role, as does whether insulation material needs to be installed underneath. This is usually the case with a wooden ceiling installed under a roof structure.
If a lower room height is desired, you can reduce the space with a substructure in a higher ceiling. This has definite advantages. With a lower room height and a well-insulated wooden ceiling, you can also save on heating costs.
When designing the ceiling with wood, you should still create a project plan in advance that considers all important aspects. This way, you can ensure that no unpleasant surprises follow after the ceiling construction or that additional cutouts need to be drilled.

Overview of Typical Types of Parquet
Why You Should Insulate Your Basement Ceiling
Before Starting the Substructure
Important: Before attaching the substructure, you should think about the laying method of the wooden ceiling. If you want to install the wood cladding lengthwise, you should attach the substructure widthwise, and vice versa. It is also important to know how large the distance between the individual battens should be.
The choice of natural wood ceiling cladding should already be made, and the boards should be ordered. When purchasing the ceiling cladding, you should also calculate enough material. It is best to get a cost estimate, which usually includes the correct amount. Professional companies also offer consultation sessions.
Also interesting: 3 options for a roof extension
A Suitable Substructure for the Wooden Ceiling
Required Tools
- Spacer wedges
- Pencil
- Drill
- Dowels
- Electric saw
- Hammer
- Jigsaw
- Screws
- Level
- Angle
- Measuring tape
Substructure
Once all preparations have been thought through and planned, you should choose a suitable substructure for the wooden ceiling. If you want to suspend the ceiling, attach it to the substructure with hangers. The simplest substructure, however, consists of a basic lathing.
Step-by-Step Installation of Wood Panels
- Step 1: The battens should be pre-drilled before installation. A distance of 60 cm ensures a stable hold. The substructure is usually mounted to the ceiling with dowels and screws. The distance between the individual battens should be 50 to 60 cm. Additionally, ensure adequate ventilation. This is especially important in a living space where cooking or showering occurs. The distance between the profiles and the wall should be 2 cm. If necessary, a counter-lathing must be installed. This prevents mold and allows air to circulate under the ceiling cladding. While installing the substructure, level with a level. If the laying area measures more than 10 meters, a movement joint is necessary.
- Step 2: Before the panels are installed, they should acclimate. The unopened packages should remain in the room for 1 to 2 days. A room temperature of around 20 degrees is recommended.
- Step 3: The profile wood clips must be attached to the substructure. Ensure that the milled groove depth matches that of the profile wood.
- Step 4: The real wood panels can now be installed with a tongue-and-groove assembly using the profile wood clips. Important: The wood panels should not end directly at the wall; a distance of 2 cm is sufficient.
- Step 5: Cover strips or finishing strips are used to cover the edges in the final step. This ensures a clean finish. Now you can enjoy a modern and warm wooden ceiling.